Friday, 6 October 2017

gates and paints, oh my

Well, we're pretty much wrapped until my mom and dad get back down to the site in late October, when the interior work starts. In the meantime, we've been completing a few finishing elements to both secure the property and prevent rust on the steel components.

Here is the front entry gate, freshly painted. We went with a gloss black for all of the painted items, in order to keep a  consistent and largely neutral palate. 

The installed front gates, being painted.

Installed front parking gate, being primed and painted.

Rear driveway gate, installed

Rear gate while it was under construction.

Boveda beamwork is now painted black. Looks sharp, I think.

more painted boveda teamwork 
2nd floor balcony teamwork, painted.

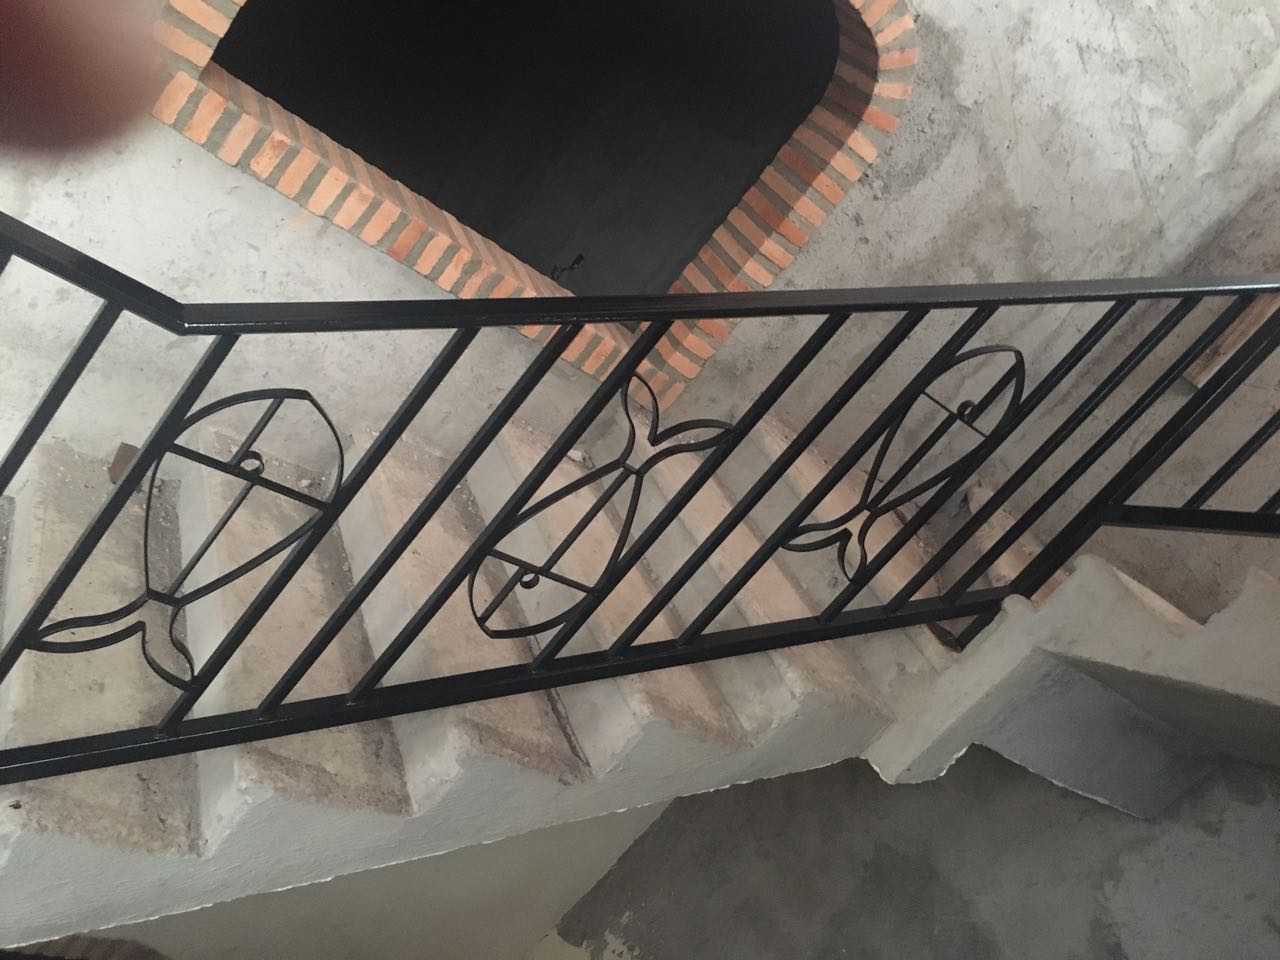
Stairwell to top floor railing. We continued with the fish pattern all the way up.

Railings at the 2nd floor turn. Silvario did a nice job on the ironwork.

more detail of the railings and the fish detail

View of the railings in the stairwell, capturing the breeze block window 

Monday, 18 September 2017

finishing the top

One of the least sexy things about construction are the details around a floor. They also happen to be amongst the most important, especially when that floor is in charge of getting rid of stormwater off of your building, and protecting the building from water penetration, corrosion, and deterioration.

Here is the finished inside of the 3rd floor utility room. Breezeblock has been installed throughout for ventilation.

Exterior of the utility room and bathroom. Here you can see the tar that is being torched down on the rooftop.

These pictures are out of sequence, but here you can see Tacho perfecting the drainage slope of the final concrete. It is on top of a wire mesh, which is on top of a membrane, which is on top of the tar.

Here is the rooftop prior to the pour. The orange tubes are electrical power for the palapa that will be installed later.

Here is the top floor with the tar and membrane installed. The boxed out area on the right is the top of the light tunnel. It is covered for the moment while plumbing and drainage is complete.

Here the pour and concrete finishing is taking place. They have to move pretty quickly, as a tropical storm will be brushing by in a few days.

more tar and paper.

The tar and paper project. This is the entrance to the 3rd floor bathroom.


fish gates, top rails, and finishing stucco

I've been tardy in posting, but a bunch of pictures have rolled in recently. Our builder Jésus has completed the top floor pour and wrapped up construction on the building exterior until we return later in the fall to oversee the internal work. Let's check it out...


the gates are complete! Here is the golf cart parking/auxilliary gate. Rob's fish design turned out pretty well, although I'm not sure if they still look like dorado as planned. It doesn't matter though, they're still really cool. Silvario did a great job manufacturing them. This same fish pattern will also be present in the stairwell railings leading up to the second and third floors. It's a nice detail, I think.

Here are the 'fish gates' from the inside looking outwards. they will be painted black and finished with an epoxy coating to keep them low maintenance.

Here is the passage gate, also with the fish pattern. I kinda think that the ones pointing downwards look a bit like pineapples. Instead of 'Casa Dorada', we might be 'Casa Piña'.

And a view of both gates together from the outside. The sidewalk in front of our house will be reconstructed, including storm drainage pipes that will go right to the curb. 

The teja (tile) on the 'eyebrows' above the first and second floors has been installed. This is on the front of the house, facing the street. Ours is the only concrete street in town, making it a high traffic location. As evidenced by the none traffic. Hey, small town.


Here, the glass block has been installed on the east side of the building. This glass block faces into a light tunnel that runs the height of the building, bringing natural light into the bathrooms and living area.

Here is the completed stucco work on the east side, bordering our neighbour Ramona. We promised to finish this side of the wall for her so that it would look nice. She also got a tree trim out of the deal, which opened up our views. win win.

Here's the southwest corner of the house. Workers complete the top rail.

Here's the west side, including the new railings and the new opening created on the 2nd floor west side. That balcony will be one of the best places to hang out, I think. The stucco work looks great- I've always been a fan of the way it can be used to soften hard concrete corners.


final pour of the construction for now, which is the concrete up to the garden area.

the top rail pour and finishing of the railings had been completed. They'll offer a nice design and colour detail. This is on the third floor looking west towards the ocean. You can also see the construction next door- Ramona is adding another bungalow on top of her existing house.

another top rail picture


Another top rail picture, and the water guy making his deliveries in the street.

yet another top rail pic. I included this one because it gives a sense both of the closeness and one of the views of the ocean that are available. Two blocks and your feet are in the sand.


Saturday, 5 August 2017

Front finishing work continues, and more electrical

Work continues on the stucco work. To make room, the street side trees were trimmed up dramatically (they grow back very quickly). The false windows in the front are filled in with breeze block.

The primary electrical pony panel under the front stairwell. This panel will allow us to split utilities between the first and second floor units in the future.

view from the front of the completed breeze block windows. 2nd floor railing is also completed.

Picture is out of sequence, but here is the worker finishing the second floor breeze block in the stairwell

primary electrical panel on the main floor gets installed.

Breeze block windows complete, along with the wall in front of lot #4. Streetfront trees have been trimmed up a bunch.

Scaffold goes up on the west side in anticipation of stucco going on. While not necessary, we thought our neighbour Ramona would really appreciate bordering a pretty wall.

Another shot of the completed wall from the front.

Completed breeze block windows

Thursday, 3 August 2017

railings and breeze block

Some of the details are starting to get filled in, and some of the important pieces of infrastructure are ready for install. A bit of the pretty stuff and a bit of the needed stuff with this update.

The stairwell window openings are being filled in with breeze block

plug and switch wiring has begun

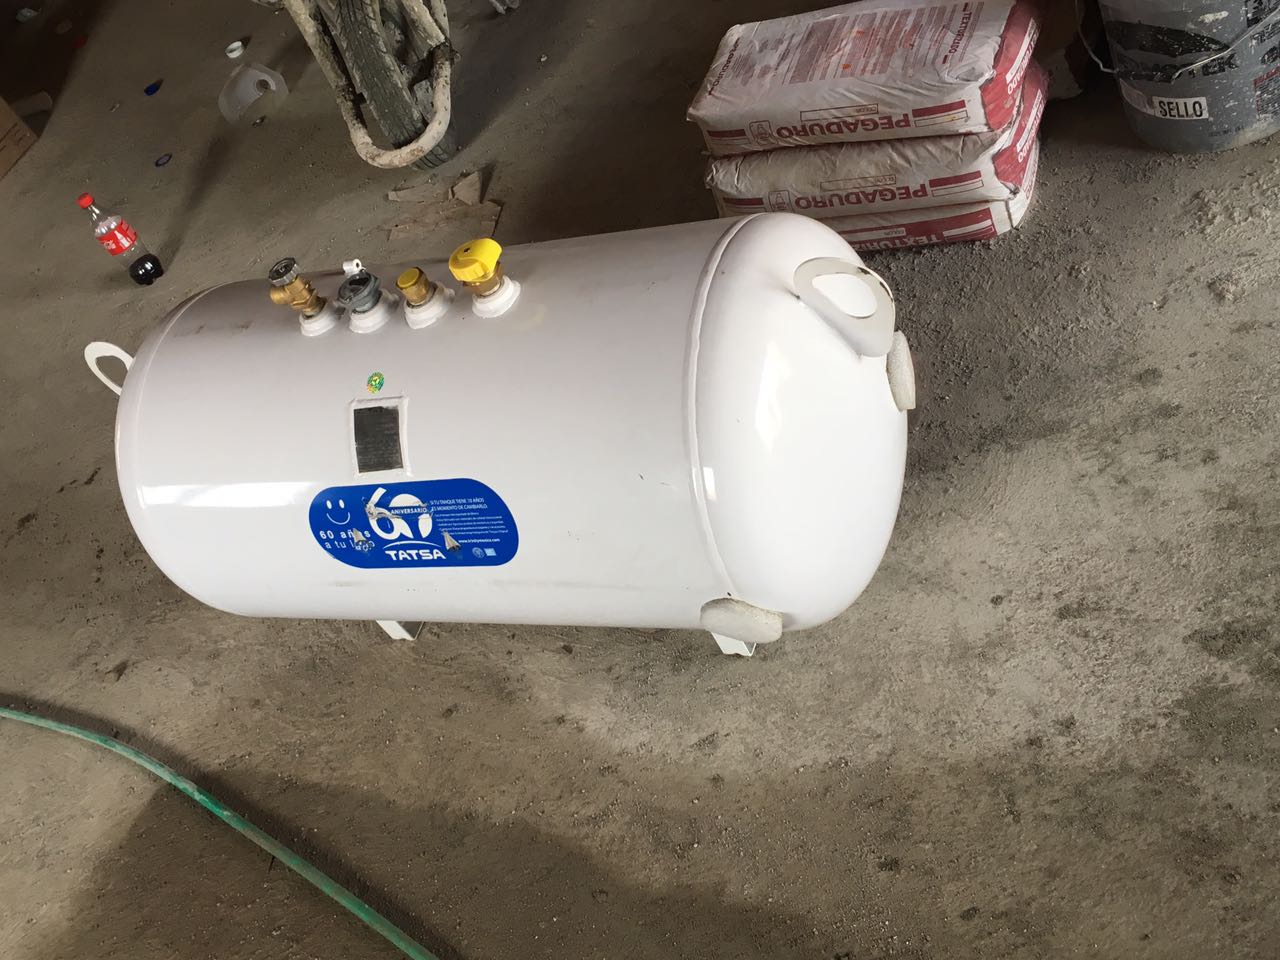
the propane tank that will provide fuel for the stoves. This will be going on top of the utility room on the third floor, with a hidden fill hose that runs to street level

This picture isn't as exciting for you as it is for me, but it is where the mountain of construction debris used to reside. It's gone now. the white marker on the rear wall shows the seperation between lots 1 and 2, which are for sale.


The southwest corner of the building. Stucco still has to be done on this side of the building, after our neighbours trees are trimmed. This picture shows the completed second floor railing.


This wall is where the second floor B suite kitchenette will be. Plugs and switches for the countertop and fridge areas are being installed.

Tinacos ready to be hoisted up to the rooftop. There will be two up top, that are fed by pressured water from the under-stair cistern.

Completed breeze block window

wiring begins for the kitchen locations

The Reveal

My wife's favourite part of any HGTV construction show is the reveal. So in a nod to that, I thought I better make it a good one. This p...