Monday, 19 June 2017

Third floor stairwell coming along

A few more pictures trickled in from Jesus today. Lets take a look!

third floor entry to the laundry/utility room area. Breezeblock will be added at the perimeter higher up for ventilation.

Stairwell between second and third floor being poured. It looks like we should get a decent amount of light down this way.

Where the stairs arrive at the third floor. 

Thursday, 15 June 2017

3rd floor coming along, light tunnel and stairs

The third floor build is coming along. The building of the utility room and bathroom is underway, as well as the above-grade finishing of the light tunnels that provide light and ventilation to the floors below.

The bottom beam is now poured where the bathroom and utility room are, and rebar for the corner posts is added.

The brickwork around the light tunnel is filling out

It's up to the 60cm mark- it will need to be railing height 1m when complete

Another shot of the east light tunnel. The formwork for the next round of stairs is happening off in the corner as well

Tuesday, 13 June 2017

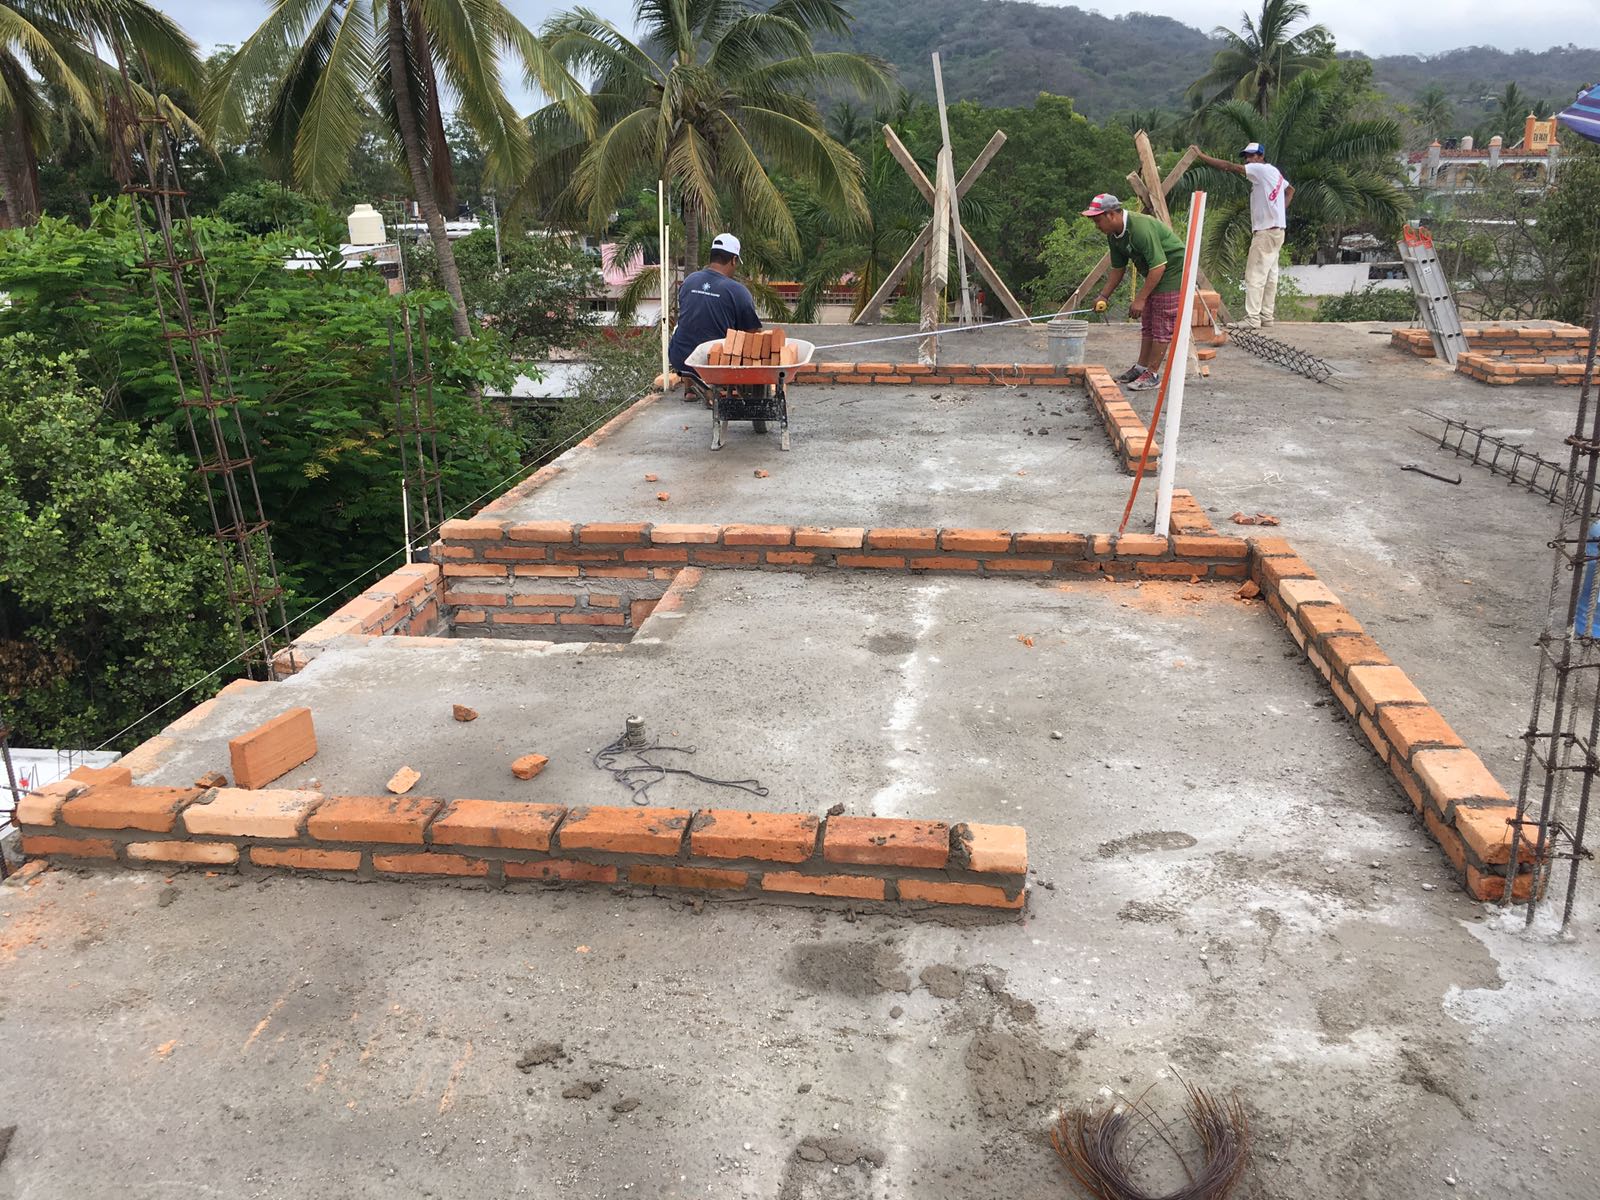
Third floor pour complete, layout begins

So we're back in Canada now, so the pictures will be coming a little more slowly. There's about 3 weeks of work left for the team in Lo D to do in order to get the structure buttoned up before the rainy season starts. This includes finishing the third floor pour, building the bathroom and utility room on the third floor, getting the waterproof membrane down on that floor, and doing the final slope pour.

the larger room on the left is the utility room, while the smaller room where Tacho is laying brick is the bathroom. Keen observers following the build will notice that the wall makes a slight jog between the two. This wall move was necessary in order to get the boveda ceiling beams on the second floor in just the right place. You really have to think in 3 dimensions when working with exceptionally heavy materials.

Entrance door to the third floor washroom. This was originally a smaller bathroom, but we elected to make it the same size as the other bathrooms because it simplified some of the structural requirements. Bigger for the same price? Might as well.

Doorway entrance to the laundry room/utility room/storage area. We moved this door in order to maximize the storage capability of the room.

Monday, 12 June 2017

video tour of the construction

Now that we're back in the land of reasonable internet upload speeds, I can post a few videos that I shot last week at the construction site. This includes a tour of the front of the building, as well as all three floors.

Part 1: view from the street
Part 2: first floor tour
Part 3: Second floor tour
Part 4: Third floor tour


Wednesday, 7 June 2017

2nd floor ceilings nearing completion, many pours begin

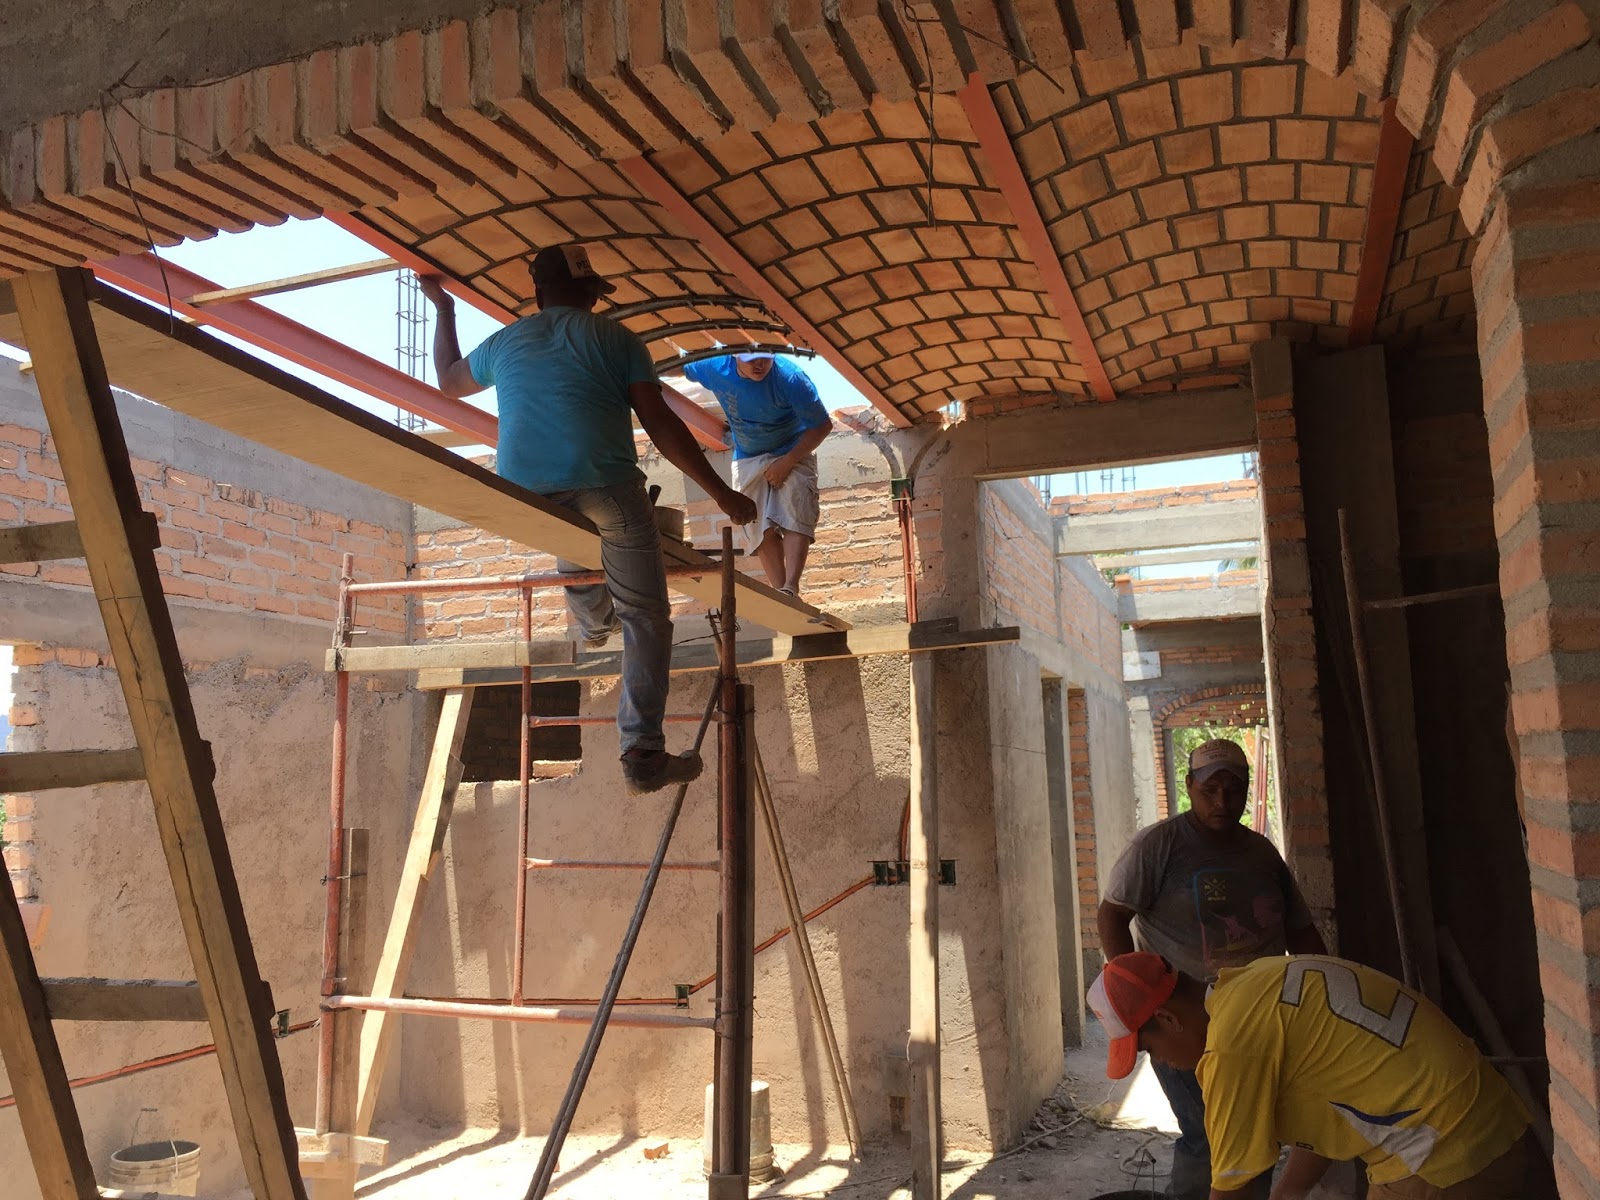
So we're only in town for a few more days. Given that, the build team had largely abandoned the things that they know how to to (boveda), in favour of the things that they knew that they needed our guidance with to get right (bulkheads). This is so that they could make sure that they're doing what we're looking for in each situation, and can replicate that in other places we're doing it.

In addition, we had a bunch of floor pours to do, and today was the day. The most critical was our front entryway, which has compound slopes in it for, among other things, wheelchair accessibility. Today we also got the main floor bathrooms poured and the stairs from the first to second floor.


View of the house from the rear. The boveda on the second floor is nearly complete, including the rear overhangs.


Boveda ceiling in the upstairs outside kitchen is complete

We're thinking of adding a couple of palma reál palapas onto our third floor terrace. They're about 3m in diameter. at only $400 each, I think we might take 2, and put them about hammock width apart.

2nd floor boveda nearly complete. this 2m x 2m opening is where the rear spiral staircase to the third floor will go.

formwork for the 1st floor living room/kitchen bulkhead is nearly complete. The pour takes place right away.

2nd floor boveda ceiling is nearly complete

 First floor bathroom pours complete, save for the shower area

Addition of bullnose formwork prior to front stairway pour

Brujo trowels the front entry way pour in his bare feet, ankle deep in cement

Future third floor terrace. Dad and I figure out exactly how the bathroom and terrace kitchen will work out, as well as where to put the palapa umbrellas.

Ceilings complete, building viewed from the rear

The boys work on making the hallway arch perfect

There's no point in having an outdoor entertainment terrace until you know how it will perform under party conditions. So a San Lunas party, complete with a wheelbarrow full of beer will do that admirably. The nice part is that a wheelbarrow serves as both beer cooler and transportation home afterwards if required.

Bathrooms poured, save for the shower area where special care is needed to ensure proper drainage sloping


Wednesday, 31 May 2017

More building boveda

I find this process endlessly interesting. The jig is placed, bricks are spaced with spacers (which also act as forms for the mortar). The gaps are filled, and they move on to the next row. Another guy follows behind after the mortar has set up a bit, and uses a special tool to scrape excess mortar from the joints to make it look perfect. It's fussy work.


 Tacho lays the brick, and his assistant works a few courses behind cleaning the joints before the mortar sets up.

 
Worker starts a new course.

 
Worker follows behind the bricklayer, scraping the joints. There are 3 different bricklaying teams, supported by 3 other workers bringing bricks and mortar

More boveda and a re engineering challenge

One of the great learning experiences of this project is appreciating how much steel and concrete, and therefore weight, that goes into construction. That means that ceiling beam placement has to occur for any structure above. But of course, those need to be spaced properly in order to create a beautiful season.

We're having to re engineer our 3rd floor structure (bathroom and utility room) in order to ensure that the second floor ceiling both looks and works in a good way. If you're ever designing a building using these building techniques, it's important to think in 3 dimensions.

 
The beefier beam in the middle is on the left side of the 40cm pillar in order to support the wall on the third floor. But it creates an asymmetrical ceiling. We want to move to the right side, which will shift the beam to the left to line up with the centre of the hallway. This means that the wall above must move as well in order to remain structurally sound.


The Reveal

My wife's favourite part of any HGTV construction show is the reveal. So in a nod to that, I thought I better make it a good one. This p...